Hand Tools
Socket Organization Tips
A well-organized toolbox is a trademark of an efficient handyman or DIY enthusiast. When it comes to socket tools, keeping them organized not only saves time but also helps prevent loss, damage, and frustration. With the right socket organization system in place, you can easily locate the required socket size and maintain a clutter-free workspace. This blog will share valuable tips to help you organize your sockets for a tidy and efficient toolbox.
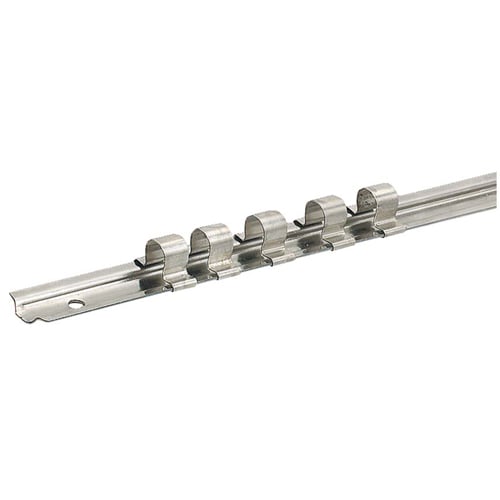
Use Socket Rails or Clips:
Socket rails or clips are an excellent way to keep your sockets neatly organized and easily accessible. These tools feature grooves or clips that securely hold each socket in place, preventing them from rolling around or getting mixed up.
Here’s how to utilize socket rails or clips effectively:
- Arrange the sockets in ascending or descending order according to their size.
- Attach the sockets to the rail or clip by sliding them onto the designated grooves or clips.
- Label the rail or clip with the corresponding socket sizes for quick identification.
Invest in Socket Organizer Trays:
Socket organizer trays are designed to keep sockets organized, compact, and structured. These trays typically have multiple compartments or rows designed for specific socket sizes.
Here’s how to utilize socket organizer trays effectively:
- Sort your sockets according to size and place each size in its respective compartment. Label or color-code each compartment for easy identification.
- Opt for organizer trays with clear lids, allowing you to quickly identify the desired socket size without opening the tray.
- Utilize Magnetic Strips or Trays. Magnetic strips or trays offer a simple and effective solution for socket organization. The magnetic surface holds the sockets securely in place, preventing them from rolling or shifting.
Here’s how to utilize magnetic strips or trays:
- Attach a magnetic strip or tray to a convenient location in your toolbox or work area.
- Place the sockets on the magnetic surface, firmly holding them in place.
- Consider organizing the sockets by size or type on different strips or trays for ease of use.
Create Custom Socket Holders:
You can create custom socket holders using materials like foam, wood, or PVC pipe for a personalized touch and added organization.
Here’s how to make custom socket holders:
- Measure the dimensions of your toolbox or drawer and cut the material accordingly.
- Create individual slots or holes in the material to accommodate each socket size.
- Arrange the sockets in their respective slots or holes, ensuring a snug fit.
Label and Color Code:
To enhance organization and facilitate quick identification, label and color-code your sockets. Use permanent markers or color-coded stickers to mark each socket size or type. This labeling system will save time and minimize the chances of grabbing the wrong socket.
Regular Maintenance and Cleaning:
To maintain an organized toolbox, it is essential to regularly inspect and clean your sockets. Remove any dirt, debris, or oil buildup that may affect their functionality or interfere with the organization system. Periodically reassess your socket organization setup and make adjustments as needed.
Conclusion:
Organizing your sockets helps keep your toolbox clutter-free and improves efficiency and productivity during projects. By utilizing socket rails or clips, socket organizer trays, magnetic strips or trays, custom socket holders, and implementing labeling and color-coding techniques, you can create a systematic and easily accessible socket organization system. Regular maintenance and cleaning will ensure that your sockets remain in optimal condition. With a well-organized toolbox, you’ll save time, minimize frustration, and have a seamless experience whenever socket tools are needed for your projects.